Using the Keyboard
| Site: | Calhoun ISD Moodle |
| Course: | iPad Support Group |
| Book: | Using the Keyboard |
| Printed by: | Guest user |
| Date: | Thursday, April 18, 2024, 11:24 PM |
1. Getting the Keyboard
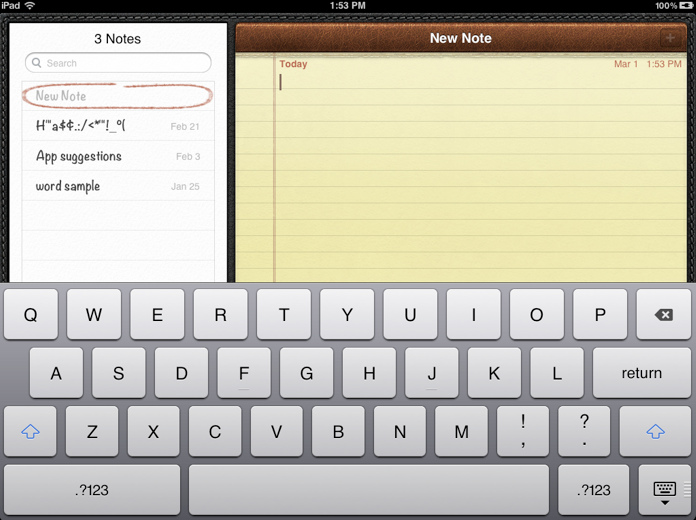
To get the keyboard to pop, simply touch the screen in an area that you should be able to type in. That's it. This works in a textbox, on a notes page, in the web address box, etc. in any app where you can type.
2. Hiding the Keyboard
Sometimes you are on a screen in an app and don't want to see the keyboard while it is showing. Touch the icon in the lower-right corner and the keyboard will hide.
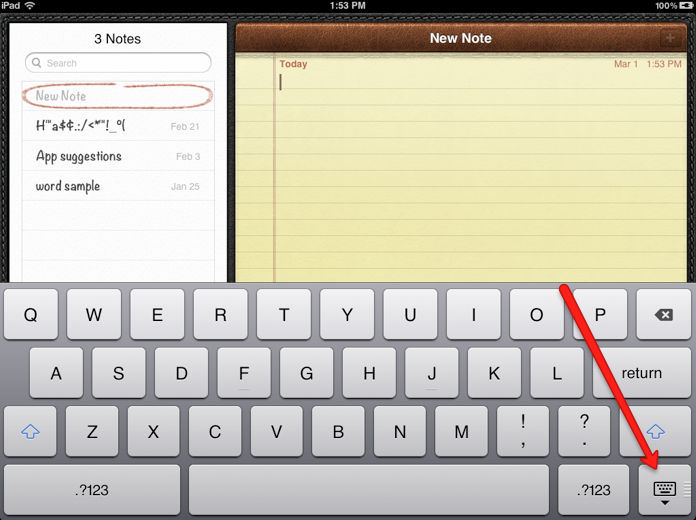
By the way, if you need the keyboard back just touch on the screen where you can type and it will re-appear.
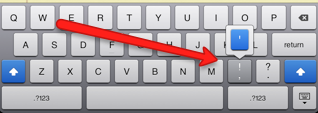
3. Splitting the Keyboard
Some people are avid texters and prefer to hold the iPad with two hands and "text" type with their thumbs. If you prefer this method of typing, you can split the keyboard to make it more comfortable. To split the keyboard, touch it with two fingers and drag those fingers apart.

To put the keyboard back together, touch a finger to each part and push it back together.
4. Three Keyboards in One
There are actually three keyboards, though 90% of the time you will probably only use the primary one. Here are the three keyboards:

Small caveat - the keyboard does change depending on the function/app it is being used for, but these are the three you will see the most.
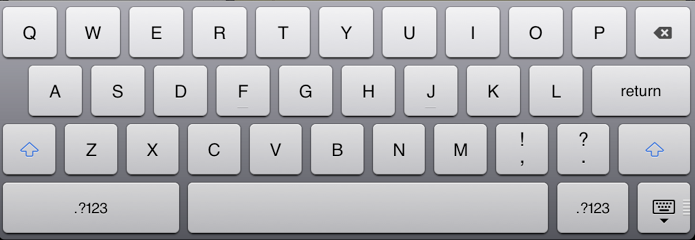
5. Primary Keyboard
The primary keyboard is your basic alpha QWERTY keyboard with added punctuation. For most purposes, this is the only keyboard you will need. One thing to know about the keyboard is that there are "hidden" keys on it. For instance, if you are typing a contraction it would be slightly annoying (and take a little more time) to switch keyboards to get the apostrophe. Well, the apostrophe is actually on this keyboard, "hidden" under the "!" . If you touch and hold the "!" for a half second, you will get a pop-up showing the apostrophe and placing it in your text.
 So what other keys are "hidden" on the keyboard?
- Quotation marks: under the "?"
- Accents for all vowels: under the respective vowel, (especially useful if you are a foreign language teacher)
- Other keys: "c", "l", "n", "s", "y", "z"
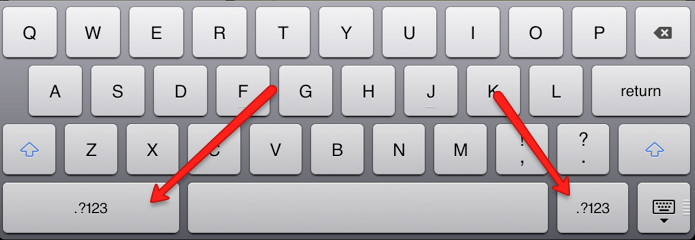
6. Secondary Keyboard
The secondary keyboard is mainly your numeric and punctuation keyboard. There are other common symbols available on this keyboard as well. To get to the secondary keyboard touch one of the "123" found on either side of the space bar.
 To get:
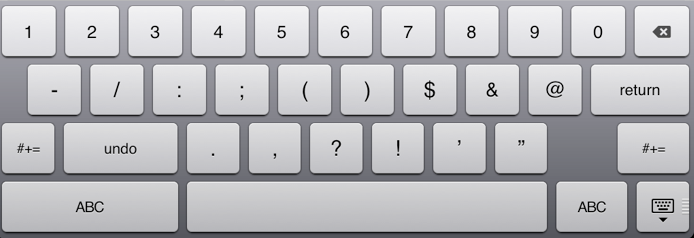
Please notice that there is an "Undo" button on this keyboard. Note: it can undo your typing or deleting of text, not full actions like on your laptop.
This keyboard also has many "hidden" keys:
- The degree sign ° is under the "0"
- Various midline dashes (and even a midline dot) are under the "-"
- Various monetary signs (including the ¢) are under the "$"
- The "..." is under the "."
- The "¿" is under the "?"
- The "¡" is under the "!"
- Various apostrophes are under the '
- Various quotation marks AND the double arrows are under the "
- The "§" is under the"&"
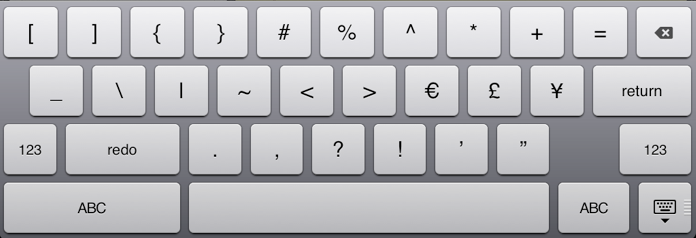
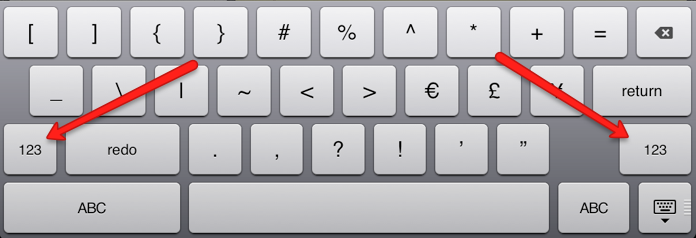
7. Tertiary Keyboard
The tertiary keyboard is mainly symbols. To get to the tertiary keyboard click on either of the keys with "#+=" on it; you will only see this key when on the seconary keyboard.
To get:

Note the "Redo" button on this keyboard. That is how you can "redo" items you have "undone" from the previous keybaord. Unlike the other keyboards, there are fe hidden keys on this keyboard, and most are the same as the previous keyboard under the punctuation.
8. Other Useful Nuggets
There are some other useful tips about your keyboard that are worth knowing. Here are a few:
- If you double tap the space at the end of a sentence, it will automatically place a period followed by a space, and turn on the auto-shift so your next letter is capitalized.
- The shift key has four functions:
- Grey key with black outline of arrow "⇧": normal mode, lower case letter
- Grey key with blue outline of arrow "⇧": auto-shift mode, first letter is uppercase then it reverts to lowercase (This happens when you use punctuation or hit return to a new line).
- Grey key with blue filled arrow "⇧": manual shift mode, you have to touch the shift to get this; it makes the next letter uppercase then reverts back to lowercase
- Blue key with gray filled arrow "⇧": caps lock mode, you double-touch to get this; it turns on the caps lock mode for all caps
9. Other Keyboard Layouts
There are other keyboard layouts you will see that will appear dependent on the app or the type of app you are using. Some examples:
- Web browsers - typing in URLs

- Areas asking for email addresses

- App specific app keyboards (this example is from Twitterific)
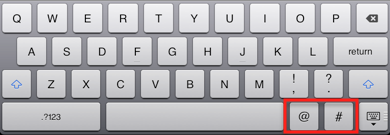
This last keyboard is an example of what you will see when running an app designed for the iPhone/iPod running on the iPad:
